Hey, I’m Ed and I’m no stranger to the war on split ends. You know the drill: hair’s looking rough, dry at the tips, a little crispy like over-fried noodles. I’ve tried every conditioner, serum, and DIY dusting trick in the book. But nothing gave me actual, visible results until I tried a proper split end trimmer yep, the electric kind that claims to snip off just the frayed ends and leave the healthy length alone. In this review, I’m breaking down the best split end trimmers, including the Split-Ender Pro, and showing you exactly what worked, what flopped, and how to use one without wrecking your hair. If you’re searching for a split end trimmer that actually works, keep reading because this tool surprised the heck out of me.
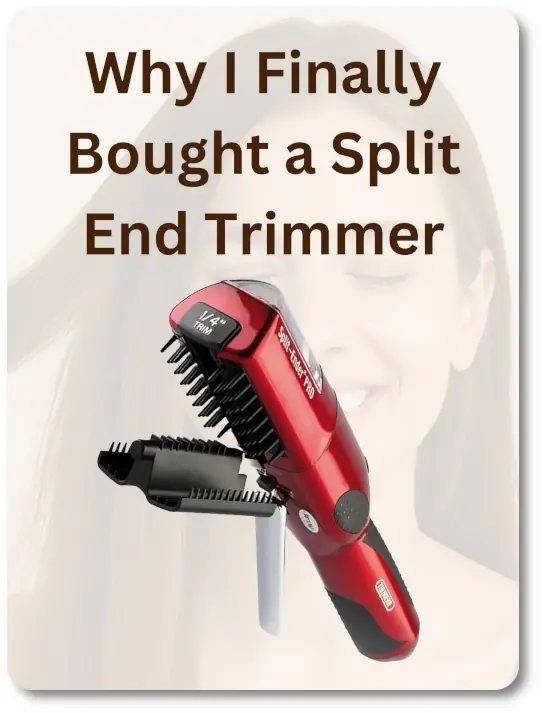
Why I Finally Bought a Split End Trimmer
Let’s back up. I love taking care of my hair, but I hate trimming it. I don’t want to lose length, and I don’t always trust myself (or scissors) to do it right. My ends were starting to look like the bristles on an old broom split, dry, and frizzy despite oils and leave-ins.
A stylist once told me:
“If you don’t cut split ends, they’ll split higher and you’ll end up losing even more hair.”
Hey, just so you know some of the links in this article are Amazon affiliate links. That means if you click and buy, I might earn a small commission (at no extra cost to you). It helps keep HairBrushy running and lets me keep testing and reviewing new brushes so thanks for your support!
So when I saw the Split-Ender Pro on Amazon promising to trim only the damaged ends leaving the rest untouched I figured, “Why not?”
What Is a Split End Trimmer (and Does It Work)?
A split end trimmer isn’t a regular hair trimmer. It’s a specialized tool designed to snip off just the ends of your hair the broken, feathered pieces that stick out and leave the healthy strands alone.
It works like this:
- You take a small section of dry, combed hair.
- Feed it into the tool (it clamps gently).
- Slowly pass the tool down the hair shaft.
- Inside, tiny blades clip away the frayed bits sticking out.
Think of it as a filter that only catches the damaged junk.
I Tested the Split-Ender Pro: Here’s What Happened
The model I used: Split-Ender Pro 2
Color: I went with red
Hair status: Frizzy, dry ends. Some breakage. Medium length.
First impression:
- Easy setup plug in and go.
- Feels sturdy, not cheap.
- The motor’s quiet but firm. Feels like a serious tool.
First pass:
I took a 1/2-inch section of hair, fed it through, and ran it down slowly.
No pulling. No snagging. Just this oddly satisfying sound like it was giving my hair a micro trim.
After the first pass, I noticed something wild:
The ends were smooth. Like polished smooth. My hair felt softer, looked shinier, and had zero scraggly bits sticking out.
By the end of the full head (took about 20 minutes total), my ends looked like I’d had a pro salon trim without losing length.
Split-Ender vs. Regular Trim: Which Wins?
| Feature | Split-Ender | Scissors |
|---|---|---|
| Removes damage only | ✅ | ❌ (you control it, but hard to see damage) |
| Preserves length | ✅ | ❌ |
| Easy at home | ✅ | ✅ (but takes skill) |
| Even results | ✅ | ❌ (unless you’re trained) |
If you’re terrified of losing length but know your ends need help, the Split-Ender is the safer bet.
Pro Tips for Best Results
- Start with clean, dry, detangled hair. The trimmer needs smooth strands to work properly.
- Use a good leave-in conditioner after. Your ends are freshly snipped seal them with moisture.
- Do small sections. Rushing equals uneven results.
- Use every 4–6 weeks. Treat it like maintenance, not a miracle cure.
Bonus: Products I Use With It
- Leave-In: It’s a 10 Miracle Leave-In – smooths post-trim
- Brush: Wet Brush Paddle – no tugging before or after
- Oil: Verb Ghost Oil – lightweight and perfect for ends
Final Verdict: Is It Worth It?
Honestly? Yeah.
The Split-Ender Pro saved me from over-trimming at the salon. My hair felt healthier, smoother, and shinier after the first use and I kept my length. It’s not cheap, but if you care about your ends and hate haircuts, this is a one-time buy that pays off over and over.
But Let’s Be Real It’s Not Magic
Okay, let’s talk about the elephant in the hair care aisle.
I’ve heard some folks say,
“It’s a waste of money it didn’t fix my split ends at all.”
And you know what? I get it. If your expectations are that this tool is going to repair your hair or replace a full trim, then yeah you might be let down. It doesn’t glue the strand back together or heal damage like some ad copy makes it sound. What it does is snip off the tiny frayed bits sticking out along the shaft. It’s maintenance, not a miracle.
Here’s what I’ve learned:
- It won’t help if your splits go deep. If your ends are truly fried, you’ll still need a real trim.
- It works best on early-stage frizz and surface splits like when your hair feels rough but still looks okay-ish.
- It’s not foolproof. You’ve gotta use it right (slow sections, clean hair), and even then, it’s not salon-level precision.
Would I recommend it to everyone? No.
Would I buy it again knowing what I know now?
Yeah because it keeps my hair in better shape between trims.
But it’s not for folks expecting instant repair or salon results out of the box.
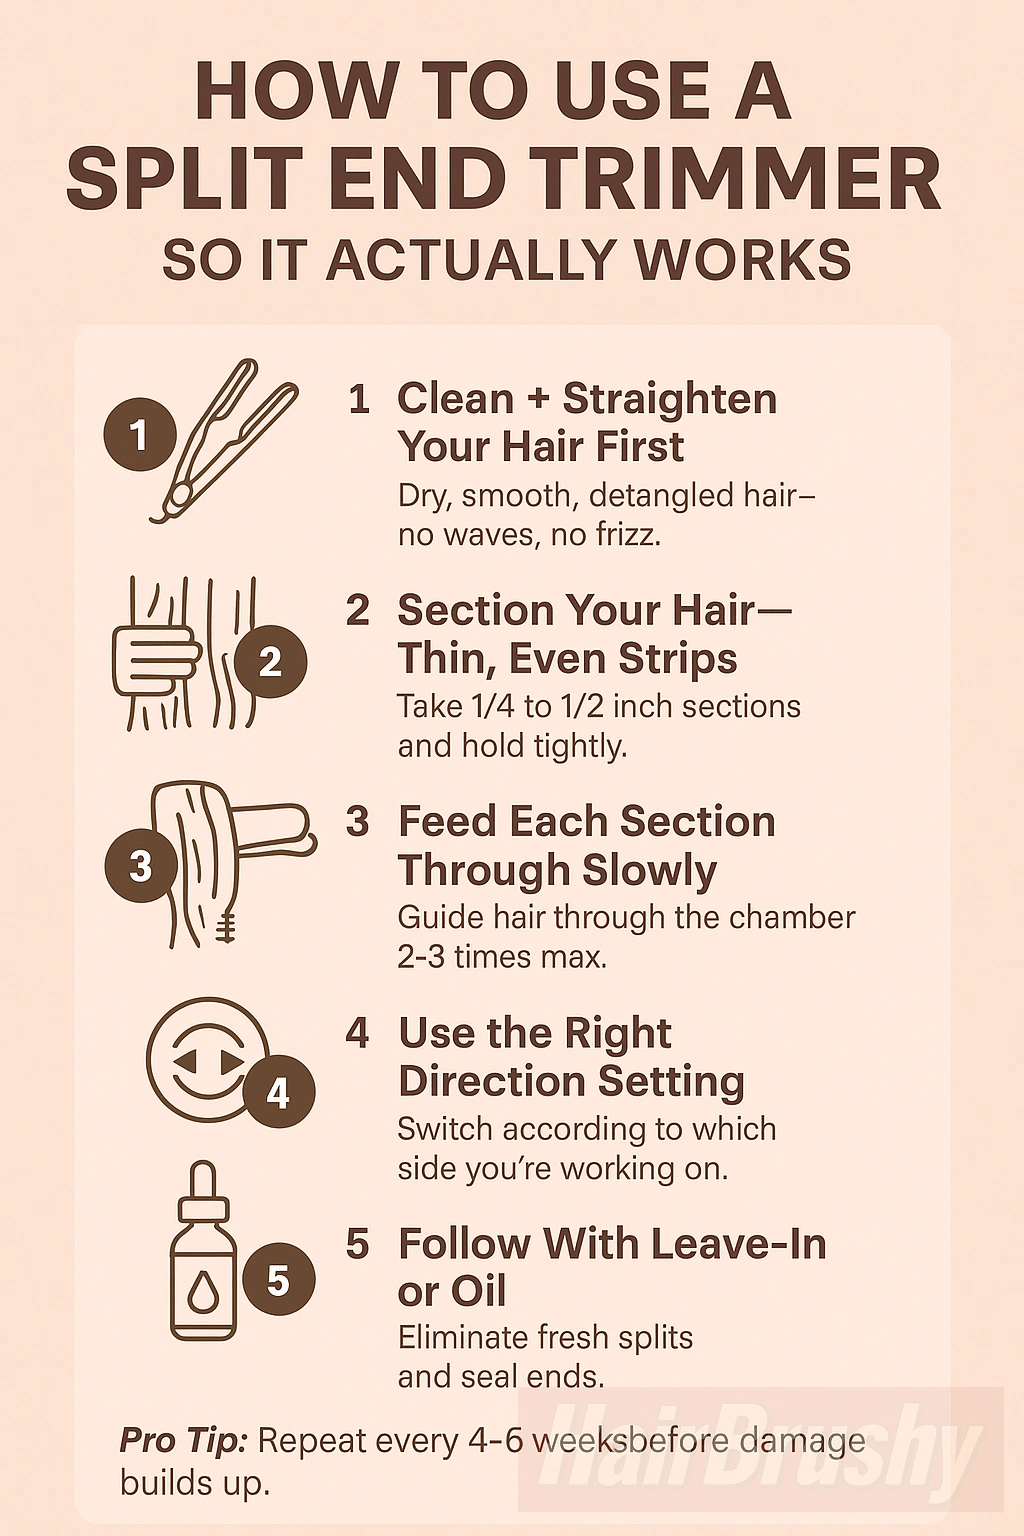
How to Use a Split End Trimmer So It Actually Works

Step 1: Clean + Straighten Your Hair First
You need to start with dry, smooth, and detangled hair no waves, no frizz. Run a flat iron on a low heat setting if needed. The trimmer works best when the ends are lined up perfectly.
Step 2: Section Your Hair Thin, Even Strips
Take 1/4 to 1/2 inch sections, no thicker. Hold them tightly between your fingers so all the tiny broken bits stick out.
Step 3: Feed Each Section Through Slowly
Guide the hair through the chamber slowly and steadily. Too fast = missed damage. Go over each section 2 to 3 times max.
Step 4: Use the Right Direction Setting
Most tools let you switch direction based on which side of your head you’re working on. Don’t skip this wrong direction means it trims nothing.
Step 5: Follow With Leave-In or Oil
Once trimmed, those ends are exposed give them moisture to keep them sealed and prevent fresh splits.
My Pro Tip:
Repeat every 4–6 weeks before damage builds up. Think of it like oil changes not repairs, but maintenance.
Why It Struggles with 4B/4C Hair – No One Will Say This, But I Will
Note for Natural Hair Beauties:
The Split-Ender may not be ideal for 4B or 4C hair unless stretched or straightened. For tightly coiled textures, consider “search and destroy” trimming or seeing a stylist familiar with natural hair care.
The Split-Ender is designed to work best on straight, aligned strands where it can detect and trim tiny frayed bits sticking out. But:
- 4B/4C hair is dense, coily, and often zig-zag shaped
- The coils don’t align well inside the trimming chamber
- The tool may miss the real split ends or even tug on strands
So yes, many Black women especially those who don’t straighten or stretch their hair find it doesn’t deliver as promised.
Solutions If You Have 4B or 4C Hair
That said, there are some workarounds if you still want to try:
1. Stretch or Blow Out the Hair First (Low Heat Only)
Using a blow dryer with a comb attachment on low heat can elongate the curls just enough for the tool to grip and cut more effectively.
2. Work in Extra-Small Sections
Because of the texture density, smaller sections help prevent snagging and make it easier for the tool to pass through cleanly.
3. Alternative Method: Search & Destroy (S&D)
This is the gold standard for natural hair:
- Stretch or twist your hair
- Use sharp hair scissors to trim visible splits only
- Time-consuming, but very effective and tailored
Who This Tool Isn’t For (Probably)
- If you always wear your 4B/4C hair in its natural curl state
- If you avoid any heat stretching or blowouts
- If your strands are very coarse or prone to shrinkage
You may be better off with manual trimming or pro help.

