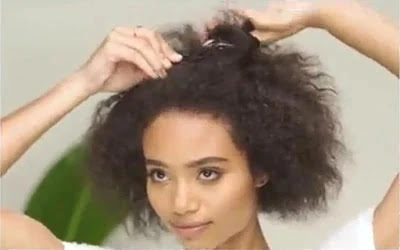
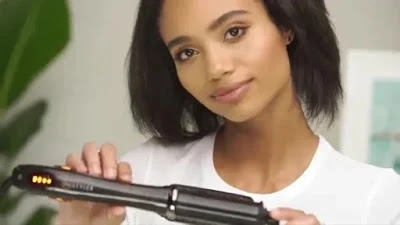
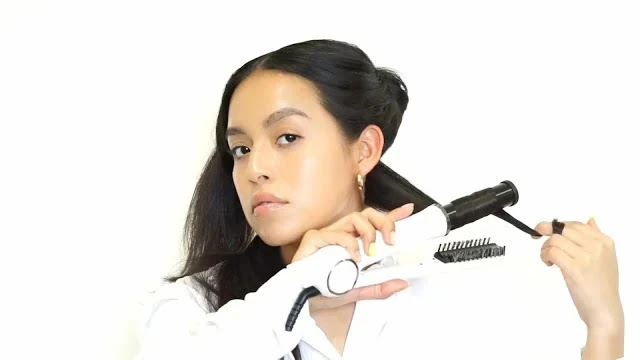
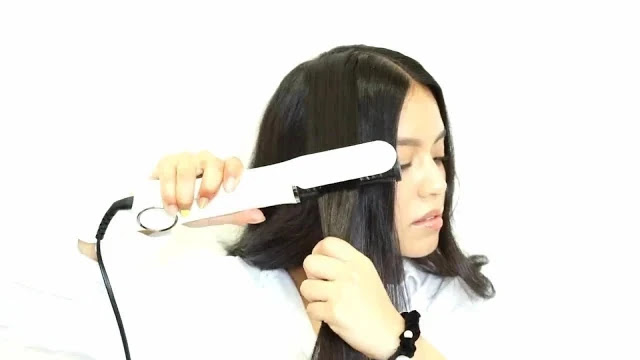
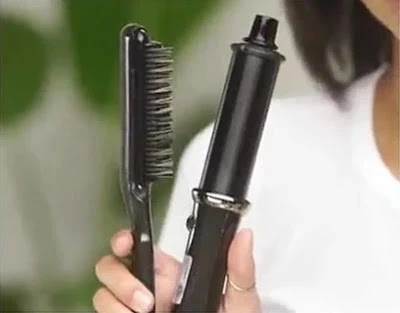
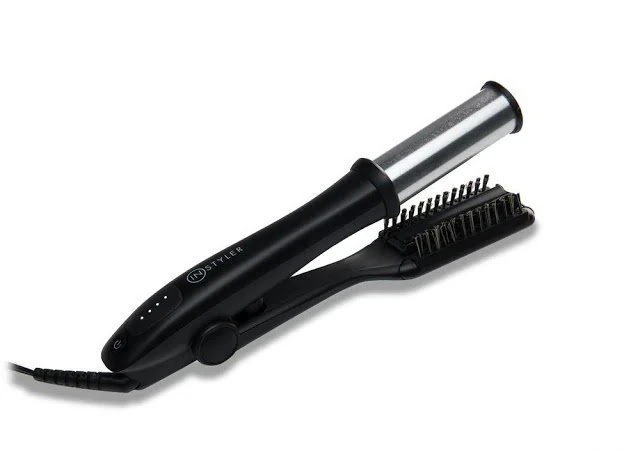
Using the Instyler 2-way rotating iron hair brush is very easy. This step-by-step instructional guide helps anyone get stylish and great looking curls as if they were made by a salon professional.
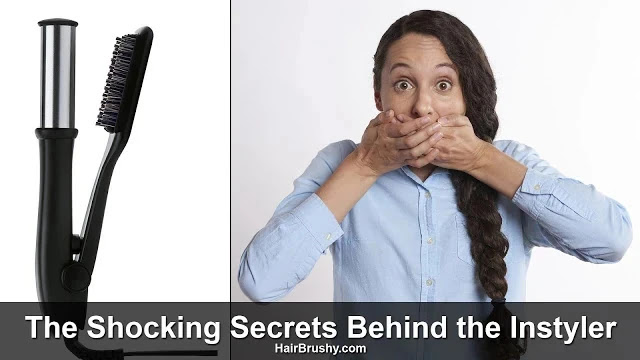
The Instyler is a very good hair styling tool for straightening, polishing and styling hair. The main difference between the In Styler and other hair straightening brushes is its heated rotating polishing cylinder and four rows of precision aligned bristles.
The heated rotating polishing barrel and bristles do most of the work for you unlike other straightening brushes where you do all the work. You’ll also find you can do much more than you could with your flat iron or even a regular hair straightening brush.
Here are 10 easy steps you need to do to get perfect results using an Instyler
| How to Use An Instyler Easy Steps | ||
|---|---|---|
| Steps | Time | Difficulty |
| 1. Start by having clean dry hair | 30 minutes | Takes Time |
| 2. Your hair should be detangled | 15 minutes | Hard |
| 3. Do not use any oil based styling products | N/A | Easy |
| 4. Set the temperature according to your hair type | N/A | Easy |
| 5. Work in sections and clip your hair | 15 minutes | Medium |
| 6. Make sure your sections do not exceed the length of the brush | < 1 minute | Easy |
| 7. As you brush your hair the ionic bristles reduces frizz | N/A | Easy |
| 8. The rotating barrel polishes your hair for a vibrant shine | N/A | Easy |
| 9. Slowly glide the brush down the stands of hair | < 1 minute | Easy |
| 10. When switching sides double tap the barrel to change rotations | N/A | Easy |
Instyler Tutorial Step by Step Instructions
1. Start by having clean dry hair
When using an Instyler you should always start with clean and dry hair. The rotating iron needs to have clean dry hair to get optimum results. According to Stacey, Hair Research Analyst, “Any oil or dirty on your hair can have a big impact on how well your hair will bend and shape.” It’s much harder to set curls or waves if your hair is not perfectly clean. It is OK however to apply a light coat of heat protectant on your hair right before you use the Instyler.
2. Your hair should also be first detangled
Use a wide tooth comb or brush to make sure your hair is detangled. All the sections of your hair should be combed and tangle free for optimum results and brightness. The last thing you want is to have to stop styling to detangle your hair. Plus you do not want any extra creases or bends in your hair due to tangles.
3. Do not use any oil base products in your hair
So this means no products that contain Argan oil and other oils. Any product that is labeled as “shine-enhancing” or “anti-frizz” are usually made with some type of oil. As the case with most any product overuse can result in lots of build up on your hair. And this even goes for dry shampoo too. Not to say that dry shampoo is oily but never-less it can cause build up over time which will make the Instyler less effective.
4. Set the correct temperature
You may want to experiment with the temperature setting if you are new to the Instyler. Start at the lowest setting and style your hair. Take note on how your hair holds the style during the day.
According to Meesh, Hair Product Analyst, “If you have thin hair you might be able to get away with a lower temperature setting.” Most folks who have thick hair are going to need a higher temperature setting for the style to hold.
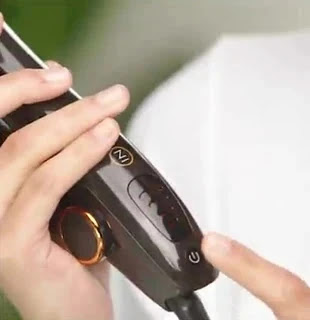
The Instyler has 3 temperature settings. A triple led bar of (385°F/196°C). A double led light bar of (315°F/157°C). And finally a single led light bar of (284°F/140°C), which is the lowest setting.
5. Work in sections and clip your hair
It’s a lot easier if you plan ahead. Decide on which side you will start and clip you hair that is not being styled out of the way. This way you have the freedom to move the Instyler into position without worrying about loose hairs getting in the way.
6. Make sure your sections do not exceed the length of the brush barrel
Your hair sections to be styled should not be wider than the InStyler barrel length. For any style you want to achieve, I recommend starting with 1 to 3 inch sections at a time. I have found that in the beginning one inch sections works great!
7. As you brush your hair the ionic bristles reduces frizz.
First style your hair under layers. After you have finished under layers, style your top layers. With your InStyler, you can use any salon quality styling product, but I do not recommend using any oil.
8. The rotating barrel polishes your hair for a vibrant shine
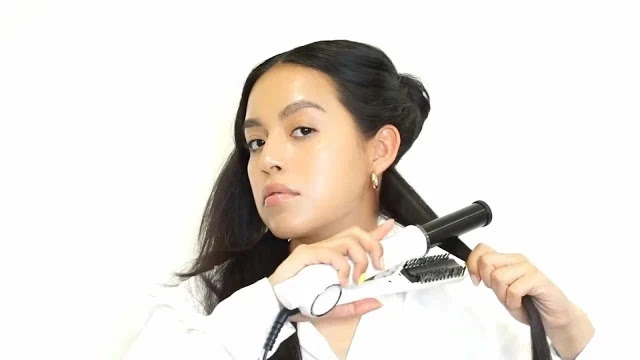
The technique is similar to using a flat iron in that you put your hair in the brush and then close the product on your hair and then move slowly down the hair length. But the similarities end here. The heated rotating polishing barrel and bristles are doing most of the work for you. You’ll also find that with it you can do much more than you could with your flat iron. Like adding curls and waves!
9. Slowly glide the brush down the stands of hair
As you slowly glide the Instyler down the length of your hair it’s rotating barrel is polishing and adding shine to your hair. It’s important not to move too fast. You can experiment on how fast you can move and what the end results are. Moving a little slower is optimum here, letting the Instyler do the work for you.
10. When switching sides double tap the barrel to change rotations.
It’s easy to change direction of the rotating barrel. This is important when you switch sides. The barrel should be rotating in the natural direction toward the end of your hair. To activate the 2-way rotation just double click.
Congratulations! You styled you first section of hair. Just repeat the process to finish.
Straighten Curly Hair in 6 Easy Steps Using An Instyler
According to InStyler,
“1. Use a leave-in conditioner
Prep your hair by deep conditioning it ahead. The leave-in conditioner hydrates your curls, preventing split ends and breakage. It’ll also keep frizz under control, keeping your hair straight and sleek all day.
Apply just the right amount to damp hair. Start at the ends of your hair then stop near the middle. Don’t put conditioner near your roots because it might cause your scalp to oil up.
Be careful not to overapply conditioner. Otherwise, the product might weigh your hair down, making it look flat.
2. Detangle your hair
Use a wide-toothed comb to make your hair as smooth as possible. Removing the knots and tangles will make straightening your hair easier. Plus, the end result will look much sleeker.
Remember to start combing the ends then work your way upwards. This way, the comb won’t cause knots.
3. Apply heat protectant
Prep your hair by spraying some heat protectant which acts as a protective layer that lowers the risk of heat damage. It also helps seal in shine and moisture, keeping the hot styling tools from drying out your hair.
4. Blow-dry in sections
With your hair prepped and protected, it’s time to grab your ionic blowdryer. Section off your hair then keep them in place by using clips. The thicker your hair strands are, the smaller the sections should be. Set your hair dryer on the medium or warm setting to minimize the intensity of the heat and risk of damage.
Dry your hair one section at a time to reduce all the moisture. Make sure you’re blow-drying in the right direction to maintain your hair’s volume. The technique is to blow-dry your roots upward, then dry the rest of your hair in a downward motion.
5. Straighten in sections
Choose a straightener with temperature control features. This lets you reduce the heat of the tool, minimizing hair damage. Use the lowest heat setting to keep your hair from drying out.
Straighten your hair by sections to make sure you don’t miss a curl. Move the straightener downward at a continuous, even pace to avoid creasing your hair.
We suggest using the chase method when straightening curly hair. This method involves using a rat-tail comb and your flatiron at the same time. Grab a section of your hair and place the rat-tail comb near your roots. Clamp your straightener on the hair above the comb then simultaneously glide both tools downward.
6. Lock everything in with hair spray
Once you’re happy with how your hair looks, lock everything in using a hair spray. Use a volumizing spray for the roots to keep them from flattening. For the strands and ends, you can use a serum or finishing spray to add some shine to your pin straight hair.“
How to do a classic blowout using the InStyler
- I always detangle and section my hair and smooth it out before styling.
- Also, I make sure the barrel is rotating away from my face.
- Then I grab a 1-2″ section of hair (make sure the section is no longer than the barrel) and spread it across the barrel evenly, with the barrel underneath the hair and the brush on top. Any then I make sure there are no loose strands hanging off the section. These could get tangled in the barrel.
- Slowly close the Max prime at my roots and then rotate my wrist slightly.
- I usually let the barrel rotate for a few seconds before gliding down hair.
- And finally for flips at the end, I rotate my wrist once at the end of the hair and hold. Congratulations, you now have a nice flip and classic blowout.
How to do a tousled wave style using the InStyler
- Again like mentioned in the above how-to I detangle and section my hair first, and then smooth it before styling.
- And again like mentioned above I always make sure the barrel is rotating away from tmy face.
- Now, here is where you have to hold tool vertically!!!! This is the most important part.
- Then grab a 1-2″ section of your hair and wrap it around the barrel. And again like mentioned above always make sure there are no loose strands hanging off the section and that all parts of the hair are on the barrel (and not the tool).
- Otherwise your hair could get tangled.
- Slowly close the Max prime on your hair for 3-5 seconds. The longer I press, the more defined the curl will be. If you have really thick hair you have have to hold longer. You will need to try a few times to get it right.
- And for a more piecey (create a textured or tousled) look or effect, pull at the ends of the hair.
- And then finally wrap your hair in alternate directions as you move through each section of hair.
- Congratulations you now have a great tousled wave style!!!
How to attach and remove the Instyler cool tip for extra fine control and comfort
- First, make sure the barrel is cool.
- Then insert the post of the Cool Tip into the hole on the end of the barrel and push until seated.
- And finally to remove the Cool Tip, wait until the unit is fully cool, then grasp the Cool Tip with fingers and pull to remove.
How to change the direction of the Instyler rotating brush
To change the rotation direction for mazimum performance when styling close your InStyler MAX twice quickly. Remember, the InStyler MAX’S motorized barrel will rotate in either direction but for maximum results make sure the barrel rotates in the natural direction toward the end of your hair. Double click to activate the 2-way rotation.
How to section hair before using the Instyler
Sectioning long hair is very important. Working in sections allows you to apply the hot air styling tool to a smaller section of your hair at one time. This technique allows you to focus on that part of your hair. This also removed the temptation to over load the styling tool with too much hair thus reducing or possibly eliminating it’s effectiveness.
- It is important to know how to properly section the hair you want to style in order to achieve the style you want with your InStyler.
- Clip your top layers of hair first with longer hair and start by cutting and styling your under layers of hair. Do not use your fingers to collect a section of hair for best results. A much “cleaner” section can be collected with a sectioning comb.
- Start with sections of 1 to 3 inches working on each side of the head to the neck nape. Grab it firmly when styling hair, but not too tightly. Let the hair glide. Let the work of the InStyler.
InStyler How To Step By Step Instructions Video
InStyler Features
The Instyler Max Prime is a hair brush ALL-IN-ONE, hot iron, hair curler that delivers amazing results from the comfort of your own home. There is also an InStyler Max Prime wet to dry model. The advantage is your hair can be wet.
| InStyler Pros and Cons | |
|---|---|
| Pros | Cons |
| Auto Shut-off safety | Fahrenheit to Celsius missing |
| Swivel cord | No Temperature lock |
| Ceramic surface kind to your hair | No power button lock |
| 7 levels of heat | No hook to hang up |
| Anti-scald safety design | Not lightweight |
| Quick heat up in 30 seconds | Need a comb thru before using |
- STRAIGHTENS BETTER: The rounded shape of the revolving barrel and the tourmaline ceramic hot plate avoids the bleaching and crushing that can flatten the skin, while the ion bristles brush and polish the bristles to reduce the frizz and give maximum shine. It’s a big plus that the InStyler Wet To Dry can be used on wet hair. However, my experience has taught me that in real life, it will not dry your hair faster than a blow dryer. So, if my hair is damp, I won’t reach for an InStyler Wet To Dry styler first. I like to use a blow dryer to dry my hair. As a result, the blow dryer is the clear winner. However, if my hair is damp and I want curls or waves, the InStyler wet To Dry outperforms a hair dryer in this case. The InStyler comes out on top in this situation.
- Optimum SALON STYLE. MINIMUM EFFORT.: The larger surface area of the 1.25 “round barrel (in addition to the flat plate) improves the heat recovery, enabling MAX PRIME to sustain a consistent high temperature of 425 ° F for maximum speed and styling performance. Multiple heat settings, in my experience, give you more control over the temperature and allow you to change the temperature safely for your hair style. This, in my view, improves the utility of the InStyler. Thick hair, for example, needs a higher heat setting than thin hair.
- PROFESSIONAL STYLING: with 360 ° straightening capacity, the MAX PRIME Rotating Styler is favored over flat irons for straightening and managing frizz, while adding body and shine. Swivel cord with a length of 7 feet. The benefit, in my opinion, is that you have a long enough cord to style with the InStyler when passing it around your head. The majority of excellent stylers have long swivel electrical cords. The InStyler is no exception.
- Use on all hair types: with 4 heat levels 285 ° F, 315 ° F, 385 ° F, 425 ° F, for all hair types: long, short, thinning, dense, rough, curly, straight and frizzy. It also has a 7′ Professional Swivel Cord and an Automatic Shut Off.
- MAXIMUM VERSATILITY: a revolutionary 1.25 “two-way rotating barrel that straightens your hair and gives you the option to easily add curl, body and shine. With its tourmaline ceramic smoothing pad, dual rotating barrel, and ionic bristles, the InStyler MAX straightens, curls, and styles hair perfectly every time. The main components are the rotating, heated polishing cylinder, the tourmaline ceramic floating tray, and the four rows of precisely aligned bristles.
According to Meesh our in-house Product Analyst, “When styling your hair, a two-way rotating barrel allows you to have the same grip on both sides of your head. To turn to the other side, shift the rotation without adjusting the grip.“
InStyler Frequently Asked Questions
Do you use InStyler on wet or dry hair? The InStyler Wet to Dry is designed to help you save time after blowing your hair dry. And it should not be used on completely wet hair. Towel thoroughly dry the hair, and start with hair that is as dry as possible. Each time you use your InStyler, you will become more effective in styling your hair.
How does an InStyler work? Rather than grinding or pressing the hair like an iron in place. The InStyler promises to leave brushed, polished, body-filled, shiny, and silky hair. The company promises that your hair will not be crushed and burned by using less heat as it does with a flat iron’s super-intense heat.
- NO BLOW DRYER NEEDED: the only wet-to-dry styler that uses patented rotating technology to straighten, add curls and waves while drying hair at the same time. Skip the blow drying out and get that much-needed blow-out look. The big advantage with the InStyler Wet To Dry is it can be used on wet hair. Now that being said, experience is that in real use it’s not going to dry your hair faster than a blow dryer. So If I have wet hair the first thing I am reaching for is not going to be an InStyler Wet To Dry styler. I would much rather have a blow dryer to dry my hair. so the blow dryer wins. But on the other hand if I have damp hair, and want curls or waves then this is where the InStyler wet To Dry has an advantage over a hair dryer. In this case the InStyler wins.
- PROFESSIONAL FRIZZ-FREE STYLING: Innovative wet-to-dry ion bristles emit ions to reduce frizz and deliver maximum shine. The rounded shape of the barrel prevents cracking and wrinkling, resulting in safe, volume-filled skin.
- FASTER, HEALTHIER STYLING: the Tourmaline Ceramic Heated Plate allows MAX WET TO DRY to maintain a consistent heat up to 425 ° F at maximum speed and styling efficiency. The advantage of having several heat settings, in my experience, is that you have more control over the temperature and can safely change the temperature for your hair style. This, in my opinion, makes the InStyler even more useful. Thick hair, for example, will need a higher temperature environment than thin hair.
- STYLING VERSATILITY: The groundbreaking 1.25 “two-way rotating barrel dries and straightens your hair and gives you the opportunity to quickly add curl, texture and shine to damp or dry hair. This, in my opinion, is a critical feature for those of you who want shiny hair. In comparison to a flat ion for straightening hair, the spinning barrel smooths the hair cuticles, resulting in more shine.
- USE ON ALL HAIR TYPES: long, short, thin, dense, rough, curly, smooth, and frizzy. For best results, using dry hair on your towel. 7′ Certified swivel cord. The benefit from my experience is you have a long enough cord to comfortably move the InStyler in position around your head while styling. Most great styler have long swivel electrical cords. And the InStyler is no exception.
Another secret is you must use the right temperature for your hair type otherwise your curl and or wave will not hold.
Can you curl your hair with an InStyler? Hold back 30 seconds. Gives beautiful, fast, bouncy curls. To make shorter flips wrap parts around the in-styler and thus close slightly allowing the rotation of the ring to change the structure of your hair to an incredible curl. Open the in-styler and bring the curl down.
The main point to remember when styling with the InStyler is that you temperature setting is very important and how long you hold the heat to your hair. All these variations are important because if you have thin hair and you have the InStyler’s temperature set too high you can burn your hair.
Remember at 450 degrees food cooks! So what I would do is experiment. Start with the lowest temperature setting and practice. See how your style turns out. Then gradually increase the temperature as you see fit.
Next, remember the longer you hold the InStyler in one spot the more heat is being applied to that one area. By holding the InStyler still on one spot for too long might not be good for your hair. So the speed is critical at which you move the InStyler through your hair.
The more you practice the better you will be become at gauging how fast to more the hot air tool through your hair and what is the right temperature for your hair.
Does the InStyler damage your hair? The InStyler is a great tool for African American Hair because it doesn’t leave crease marks like flat irons, and the polishing barrel and bristles leaves the hair looking shiny and beautiful. When used properly, the InStyler is suitable for every hair type.
Will I first dry my hair before using the InStyler? Yes, always start with clean dry hair. Your hair should be completely dry. This tool does not dry your hair. By having completely dry hair your style will hold much better and will last much longer.
In addition, it’s good to know that if you do have damp hair it will take much longer to style your hair. My recommendation is not to even try to style with damp hair. I recommend air drying your hair of use a blow dryer before styling with the InStyler. This will save you time and you will have a style that will last all day and not just a few hours.
How hot does the InStyler get? The Instyler has 3 temperature settings, triple bar (385°F/196°C), double bar (315°F/157°C) and single bar (284°F/140°C).
This is where the InStyler can use some improvements. My opinion is that indicator lights are OK but it should have an LED display with the temperature shown. It is very important to know the heat setting as to not burn your hair. Thicker hair will be able to tolerate higher temperatures. Thicker hair will also require a higher temperature setting than fine thin hair. By not applying enough heat to thicker hair the end result is your style will not last all day.
for people who have thin hair you can get away with a much lower temperature setting and your hair will hold it’s shape all day. Why use a 385 degrees setting when you can get the same results with a much lower setting? the three indicator lights and three heat settings is just not enough. The tool should give you more control and let you fine tune the temperate to your exact needs.
My opinion is that I would not let this stop me from making a purchase. The InStyler is a great tool at a good price. But approaching $100 it should have an LED display.
Another area of improvement I would liked to have seen is the ability to lock the temperature setting. This way there is no way I can accidentally change the temperature while styling. Let’s say I am styling my hair on the low setting. I have thin hair and a lower temperature is all I need. While styling I accidentally press the temperature button and now I am using the highest temperature setting. Remember I have thin hair so this could easily burn my hair if I am not paying close attention.
So for almost $100 the InStyler could have included this feature. Still, this would not prevent me from making a purchase. This is a very good styling tool.
Instyler Models And Feature Comparison
| InStyler Model Comparison | ||||
|---|---|---|---|---|
| InStyler Models | Straightens | Volumize | Curls & Waves | For Wet Hair |
| InStyler Max | Y | Y | Y | |
| InStyler BLU Turbo | Y | Y | ||
| InStyler Prime | Y | Y | Y | |
| InStyler Max Wet to Dry | Y | Y | Y | Y |
| InStyler Glossie | Y | |||
| InStyler Ionic Styler Pro | Y | Y | Y | |
For more on the InStyler original silver rotating iron please see my article called: InStyler original hot iron silver 3/4 inch. Here is discuss the features and a short video. the 3/4 inch version is the one I would pick for short hair. There is also a Titanium model. To see my short write-up click here: InStyler Titanium 1.25 inch 1-way straightening and styling iron. InStyler also has you covered if you are interested in tourmaline ceramic technology. For more and a qucik look click here: InStyler Max 1.25 inch 2-way rotating tourmaline ceramic straighter and styler in red. For a quick demo on how to style hair click here: InStyler original demo how I style my hair. And if you are interested in getting that big Hollywood volume look then you will not want to miss out on seeing my article called: Big voluminous Hollywood hot air InStyler tutorial. And for even more on how to achieve Hollywood click on my other article called: How to achieve Hollywood hair using the InStyler.
But did you know the InStyler can be used to also curl hair? In addition to straightening it does a fantastic job at curling. Click here is to see my article and quick video on How I curl my hair with the InStyler hot brush. And more even more on InStyler curls click on my quick article called: InStyler curls tutorial. You will be glad you did. It’s easy to get those perfect curls using the InStyler. See how you can do it by clicking on my HairStyles getting the perfect curls InStyler Max tutorial.
Techniques from InStyler
Three volume levels. There are different ways to collect a section of hair depending on what style you want to achieve.
- For general straightening and soft curls, use a horizontal hair section.
- Use a vertical section of hair for additional body and volume.
- Use a “square” section of hair for even more body and volume. Use a sectioning comb to make a square section of hair.
The MAX 2-Way Rotating Iron is a straightener and curling wand in one, takes the “flat” out of you hair. The curling iron part rotates with the hair brush combs through the hair.
References:
Instyler.com and Robin Higgins from Pixabay

